TECHNICAL DOCS

Using Windocks with Azure Active Directory Domain Services (AADDS)

Tips for utilizing "Azure Active Directory - Integrated" authentication for Windocks servers hosted in Azure


Prerequisites

These tips for utilizing "Azure Active Directory - Integrated" with Windocks assume the following configuration.


Setting up users using SSMS

Prior to installing Windocks on the VM, you can set up users in your default (base) SQL Server instance that can be automatically provisioned when creating new database containers.  You can also use SSMS to add users after Windocks has created SQL Server containers.

For example, if you want a specific user to have administrator privileges, you can use SQL Server Management Studio (SSMS) to add those users by email name.  SSMS can automatically convert the email name to the SamAccountName format used by SQL Server for Windows authentication.

To utilize SSMS to add users:

  1. Login to the Azure VM connected to the AADDS domain as administrator.
  2. Launch SSMS and connect to the SQL Server default instance using Windows authentication.
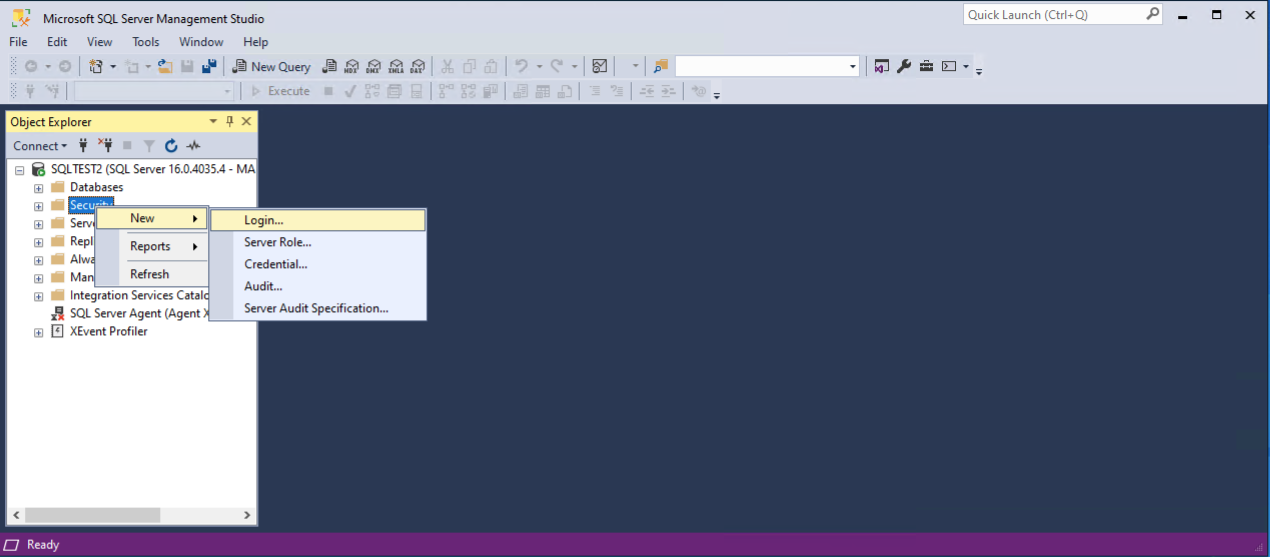
  3. Right click on Security and choose New, Login...

    ssms-new-login

  4. From the Login - New dialog box, with the Windows authentication radio button selected, click Search...
  5. From the Select User or Group dialog box, enter the email address of the user you want to add.

    ssms-email-address-2

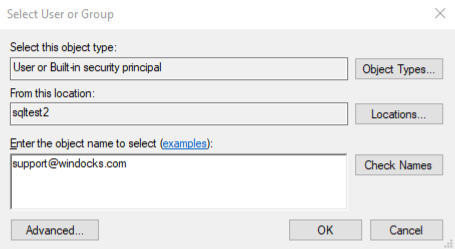
  6. Click Check Names.  You may be prompted for your Azure Active Directory credentials. SSMS should resolve the email address to an Azure Active Directory username.

    ssms-aad-user

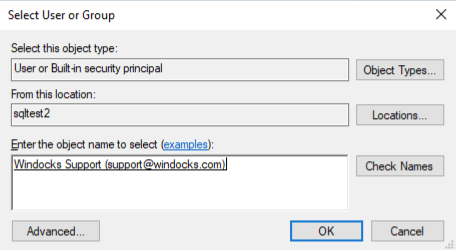
  7. Click OK to dismiss the Select User or Group dialog box.  SSMS looks up the SamAccountName for the AAD user and populates it automatically in the Login - New dialog box.

    ssms-samaccountname

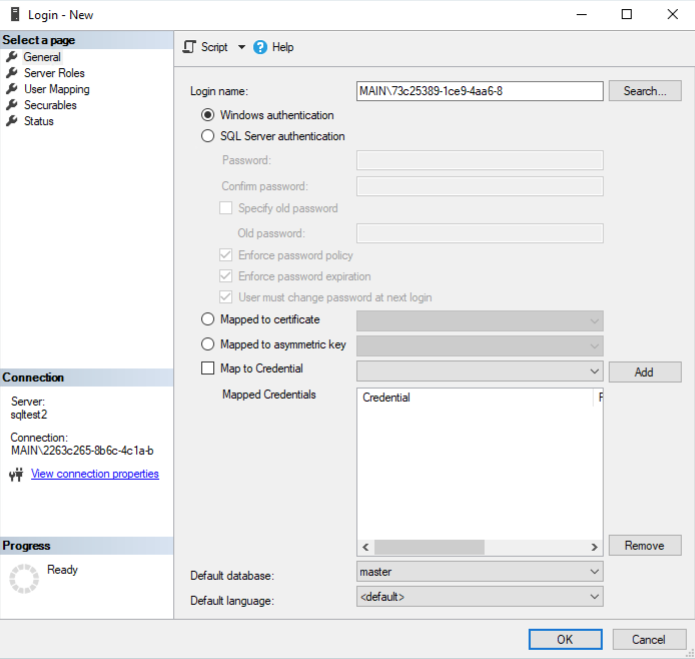
  8. Click OK to dismiss the Login - New dialog box.  Your login has been created.
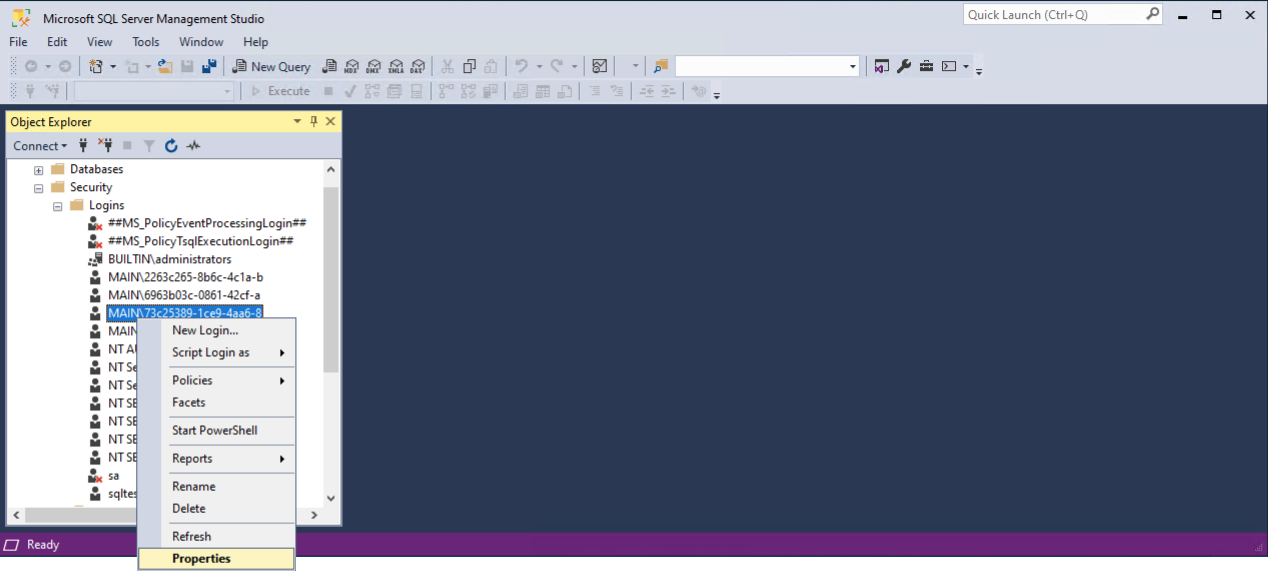
  9. If you want to assign the new user system administration privileges, expand the Security→Logins tree, right click your user. and choose Properties.

    ssms-user-properties

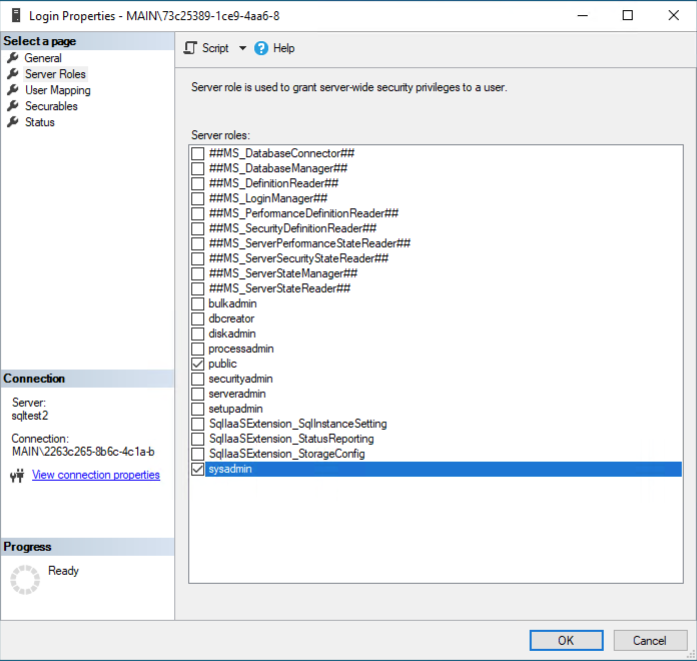
  10. In the Login Properties dialog box, check sysadmin and click OK.

    ssms-sysadmin

Congratulations!  If you added this user to the default instance, this user will now be included in all database containers you create with Windocks.

You can also follow these instructions when connecting to database containers as an administrator to add users to that specific container.


Setting up users via script

If you have the SamAccountName, you can also set up users via script.  Below is a script example for the user created above with SSMS to create a user and add sysadmin privileges.


CREATE LOGIN [MAIN\73c25389-1ce9-4aa6-8] FROM WINDOWS;

ALTER SERVER ROLE [sysadmin] ADD MEMBER [MAIN\73c25389-1ce9-4aa6-8];


For creation of users in individual containers, Windocks can automatically run a SQL script on creation of the container by specifying its filename in the dockerfile through the COPY and RUN commands.  Below is a dockerfile example utilizing the COPY and RUN commands when the same SQL script should be run for each container.

FROM mssql-2022
SETUPCLONING FULL dbname D:\path\to\fullbackup.bak
COPY adduserscript.sql .
RUN adduserscript.sql


You can also use environment variables in the dockerfile to specify different scripts for different containers built on the same image at runtime.  This capability might be useful to provision different users for different containers.  Below is a dockerfile example utilizing environment variables, with the conventions STARTENV_ and _ENDENV.

FROM mssql-2022
SETUPCLONING FULL dbname D:\path\to\fullbackup.bak
# The convention is to put the variable name in between the delimiters STARTENV_ and _ENDENV
COPY STARTENV_filevariable_ENDENV
RUN STARTENV_filevariable_ENDENV


You can then build the image using this dockerfile and then specify the value for the environment variable at runtime.  Below is an example of the docker run to create a container by specifying the SQL script at runtime.

docker run -d yourimagename -e filevariable=adduserscript.sql


These scripts assume you know the SamAccountName for the users.  If you don't want to utilize SamAccountName, you can add users via SSMS.  If you don't know the SamAcountName, you can follow the instructions below to get the mapping of users to SamAccountName.


Getting SamAccountName for AADDS users

You can use Powershell to get information about AADDS users through its synchronization with Azure Active Directory.  To install the necessary Powershell module, launch Windows PowerShell and use the following commands.

Install-WindowsFeature -Name “RSAT-AD-PowerShell” -IncludeAllSubFeature

Import-Module -Name ActiveDirectory


The following session shows an example of using Get-ADUser to output SamAccountName for users in Azure Active Directory.

PS C:\Windows\system32> Get-ADUser -Filter 'Name -like "*"' | Format-Table Name,SamAccountName -A
 
Name                SamAccountName
----                --------------
Guest               Guest
krbtgt              krbtgt
dcaasadmin          dcaasadmin
SkyKick Inc.        migrationapp
Paul Stanton        03fa2be8-a281-4140-a
Steve Pao           2263c265-8b6c-4c1a-b
Vinod Kumar         6963b03c-0861-42cf-a
Windocks Support    73c25389-1ce9-4aa6-8
windocks.com        admin
windocksstore       SA_4e52211e42
Ramesh Parameswaran 75376072-7a6a-490e-b
Vanny Him           b14658a1-bfba-4021-9
Windocks Finance    f3ba75f1-c542-4378-b
 
 
PS C:\Windows\system32>


You can now use these SamAccountName values to create users and add roles to your database via script.  Again, if you do not want to use SamAccountName, you can manage users via SSMS.


Accessing the database containers

To access the database containers, log into a Windows machine in the same Azure Active Directory Domain Services (AADS) as the desired user (in this example, support@windocks.com).  You'll notice under Windows authentication, the SamAccountName will be pre-populated and you should be able to connect to your instances.

client-windows-auth

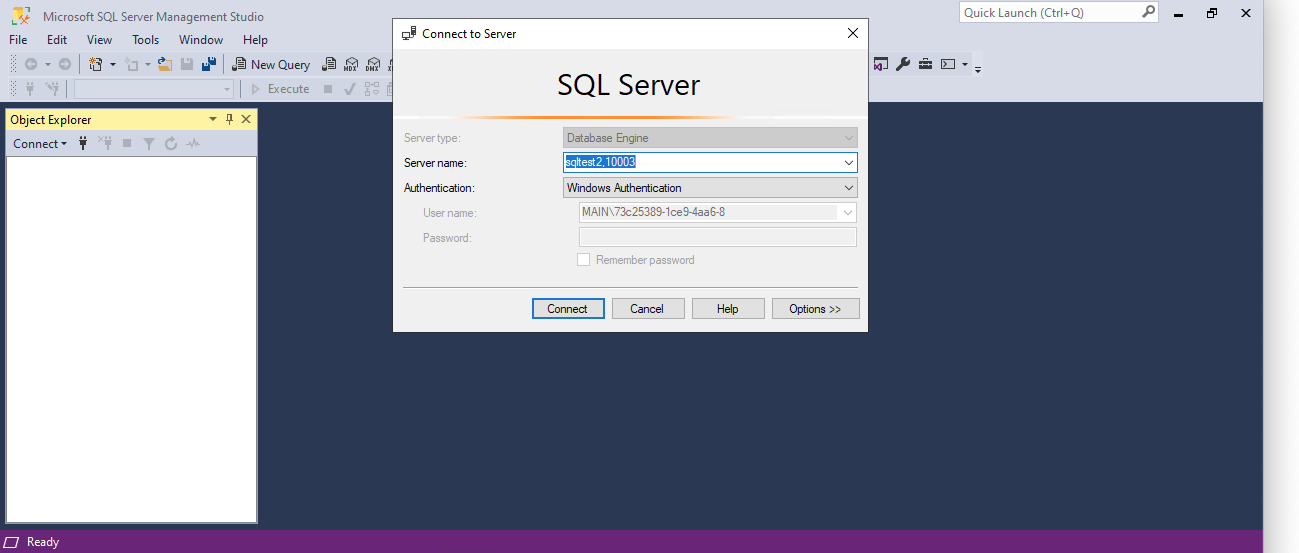
Under Azure Active Directory - Integrated, your SamAccountName will also be pre-populated.

client-azure-active-directory-integrated

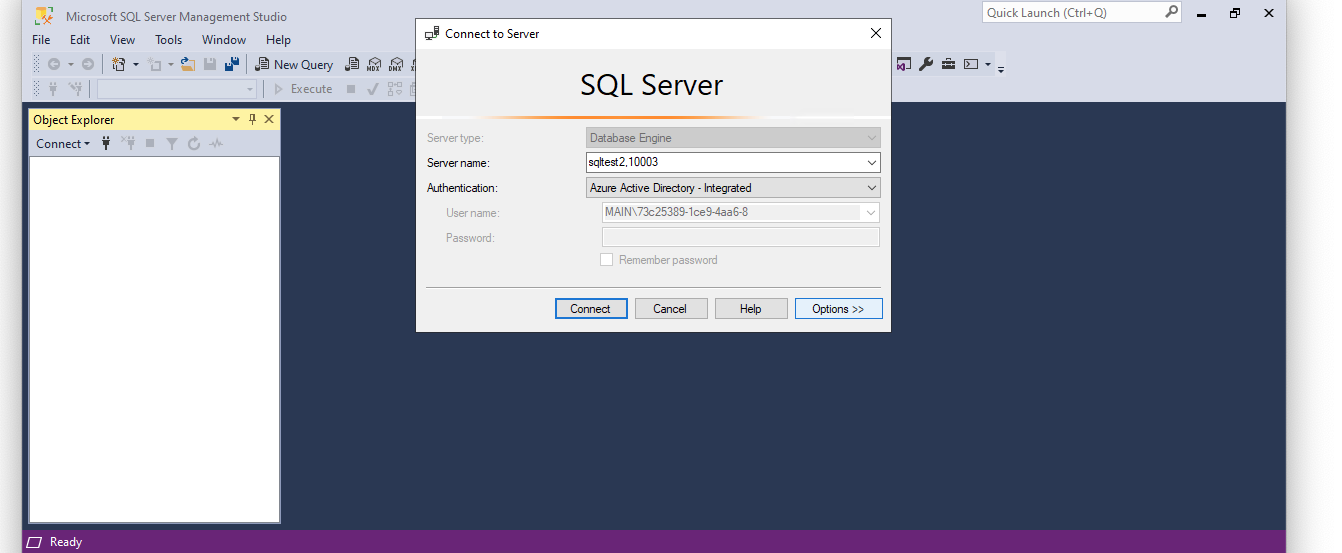
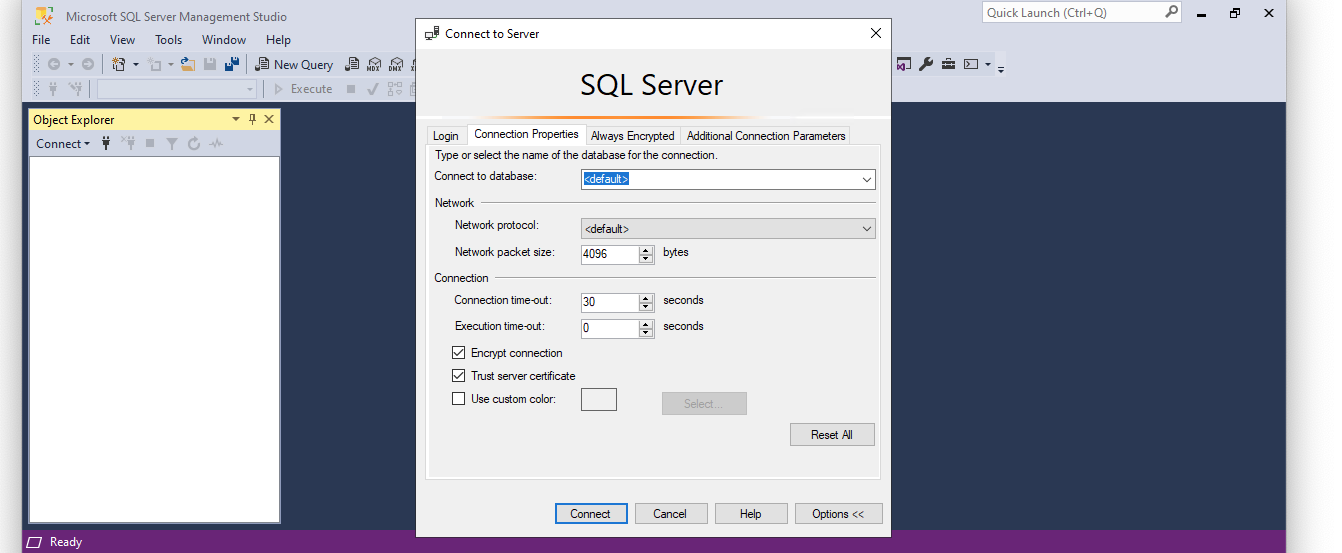
However, when using Azure Active Directory - Integrated, please note that you may need to click Options >> and choose the option to Trust Server Certificate in order to authenticate.

client-trust-server-certificate


Extend CI/CD to your data layer